Setup Oracle JDK 22 on macOS Step by Step
- Details
- Written by Nam Ha Minh
- Last Updated on 29 April 2024 | Print Email
1. Download macOS Installer for Oracle JDK 22
For macOS, Oracle JDK is distributed as compressed archive (.tar.gz) as well as DMG installer. It’s recommended to use DMG installer as it’s quick, easy and convenient to setup Java 22 for macOS.Click this link to visit the official Java downloads page for macOS. You will see the following files available for download: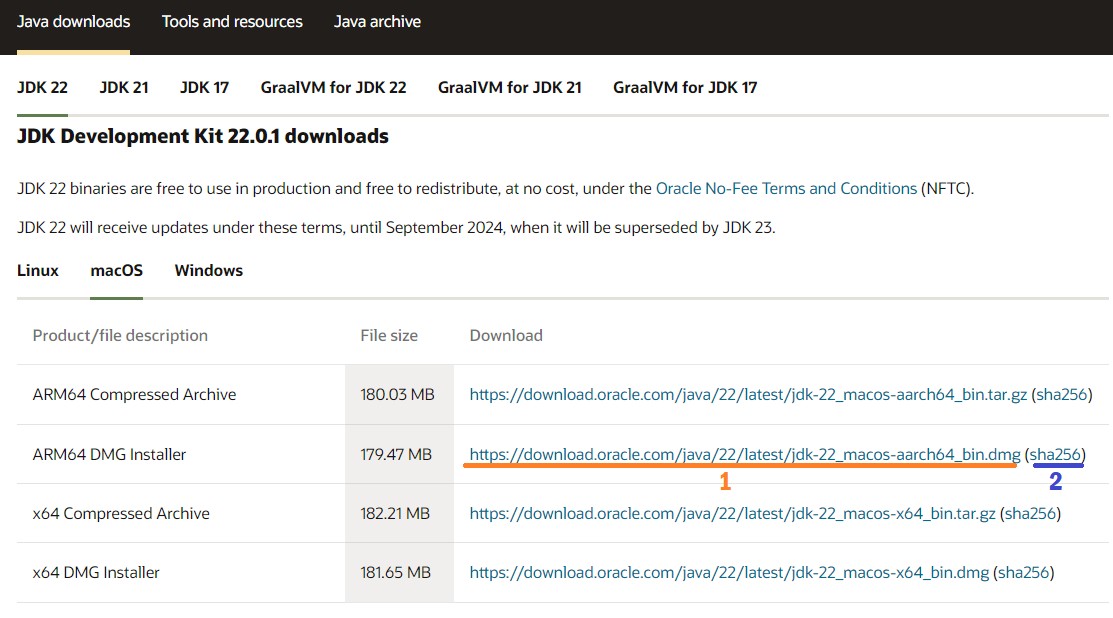 There are two types of DMG installer:
- ARM64 DMG Installer: this is for Mac computers running on Apple CPU (Apple Silicon), typically new or recent Macs
- x64 DMG Installer: this is for Macs equipped with Intel CPU, which are older
2. Verify Installer File
Do not run the installer right after download. It’s strongly recommended to verify the integrity of the downloaded file before opening it. On the download page you can see the sha256 link (2) next to the download link (1). Click and it will show the SHA256 checksum value of the original file.Now open a new Terminal window, change the current directory to where the downloaded file is saved. Then type the following command:shasum -a 256 jdk-22_macos-aarch64_bin.dmg
this prints the SHA256 checksum value of the specified file. Then compare it against the one provided in the sha256 link above. If both are the same, that means the downloaded file was not tampered with and you can open it safely.3. Run Oracle JDK 22 macOS Installer
Double click the installer file. Then double click JDK 22.pkg package to start the setup of Java 22 on macOS with Oracle JDK distribution. The JDK 22 installer program appears as shown below: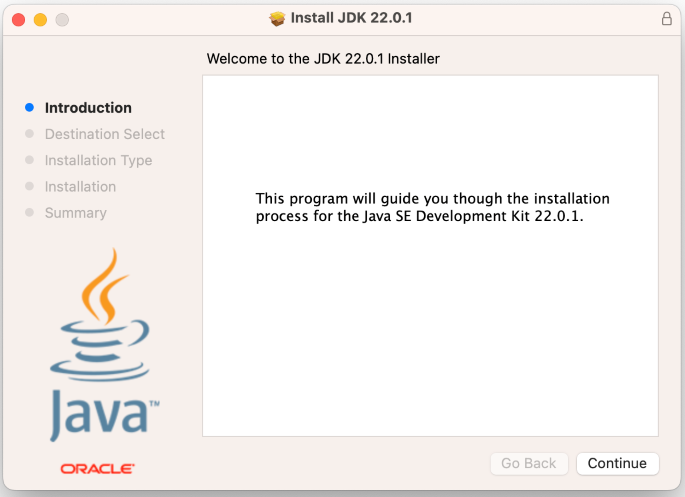 Click Continue two times, then click Install to proceed Java 22 setup on macOS with default installation location. You need to provide administrator password to install the software. The setup will run very quick. Finally, it says “Install Succeeded”. Click Close to quit the installer.
 4. Verify Oracle JDK 22 Installation on macOS
Using DMG installer, you don’t have to manually configure environment variables as it puts the java and javac executables under /usr/bin folder which is included in the PATH variable by default. The default installation directory is /Library/Java/JavaVirtualMachines/jdk-22.0.1.jdk.To verify Oracle JDK 22 setup on macOS, open a new Terminal window and type java -version and javac -version commands. You should see the following output: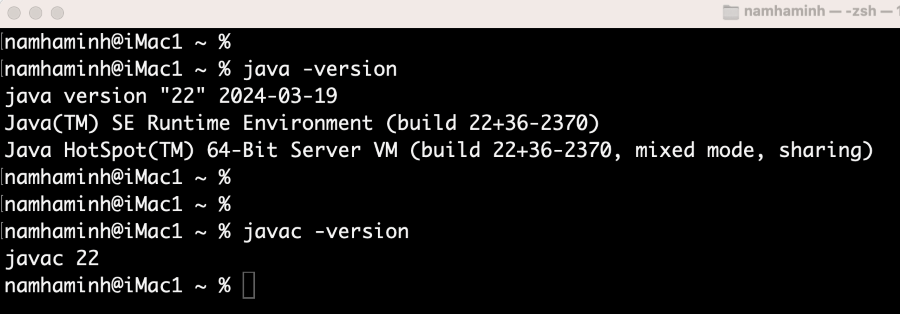 That means Java 22 has been successfully installed on macOS with Oracle JDK distribution. You now can start developing and running Java applications on Mac computers.To see the setup of Oracle JDK 22 on Mac in action, watch the following video:
 Related Articles:
- How to set JAVA_HOME in macOS and Linux permanently
- How to set JAVA_HOME environment variable on Windows 10
- What are JVM, JRE and JDK
- How to write, compile and run a hello world Java program for beginners
- Java Core Language Tutorials
About the Author:
 Nam Ha Minh is certified Java programmer (SCJP and SCWCD). He started programming with Java in the time of Java 1.4 and has been falling in love with Java since then. Make friend with him on Facebook and watch his Java videos you YouTube.
Comments